

Amazon Redshift is a true powerhouse in allowing users to handle and analyze big data data sets. While some competitors may be in the same field, for companies who likely already have AWS solutions in their stack there’s little point in branching out when Redshift is right there, ready to help you handle your data.
That’s where Redshift’s workload management feature comes in.
Workload management lets you make the most of your clusters by setting up queues you can use to run parallel queries with set memory allocations per query slot.
In other words, it’s a vital tool in making sure that your Redshift clusters are working at full capacity. Without workload management it’s highly likely that your queries will be slotted into any old random configuration, with complex queries hogging memory and throttling the speed of others.
So, to get you started with maximizing your query throughput, in this post we’re going to cover:
- What is workload management (WLM)?
- Why is workload management useful?
- Automatic vs manual WLM
- How to set up WLM
- Making the most of your AWS
Let’s get started.
What is workload management (WLM)?

Workload management is a feature of Amazon Redshift which lets you create and control query queues within your cluster. This allows you to dictate the number of queries which can be running in parallel at any given time which, in turn, means that you can make full use of the resources at your disposal.
In other words, it’s a great way to make sure that large queries that take a long time to complete don’t clog up the system and prevent smaller queries from being resolved.
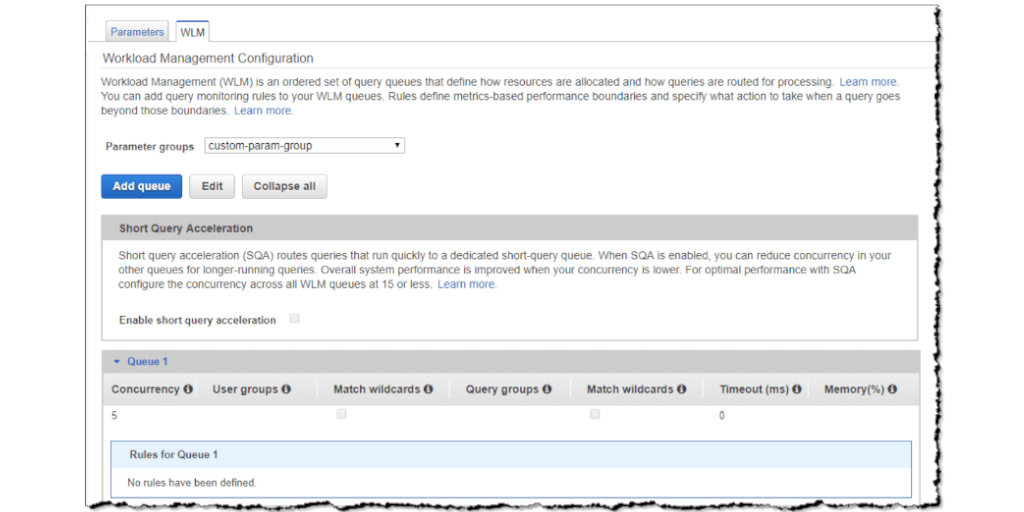
Redshift workload management (WLM) is configured within parameter groups, meaning that you can have different WLM settings for different associated parameter groups. So, if you have one group which you know will need to handle a mixture of large and small queries (or a heavier load in general), you can create more queues to suit that group and spread the load more evenly without affecting your other groups.
By default you will have one queue set up with the ability to run up to 5 concurrent queries. Adding more queues will let you split the load more evenly, and you can also control the number of queries which can be allocated to each queue for further control.
The last queue in your setup is considered to be your default queue. This means that all queries will automatically go into this queue first unless they’re filtered into a different queue according to your WLM configuration.
Why is workload management useful?
We’re going to borrow a page from Intermix Software here, as their explanation of Redshift WLM is truly fantastic.
Let’s say that you have three types of queries running in your Redshift cluster at a particular point in time:
- “Loads” are small queries which take around 5 seconds to run
- “Transforms” are more substantial and complex queries, and run for 60 seconds
- “Ad-hoc” queries are complex ad-hoc requests which take roughly 20 seconds to complete
When your Redshift cluster is beset by 5 or fewer queries of any type (loads, transforms, or ad-hoc) everything is fine even with the default single queue with 5 parallel query slots. Handling 5 queries at the same time is what the system is designed to do, so everything is started as soon as it’s submitted and takes the minimum amount of time possible.
Now imagine that there’s a sudden run on your system.
Maybe everyone logged into the system on Monday morning and refreshed their desktops at the same time. Perhaps a new data analysis project began and suddenly you were swarmed with ad-hoc queries.
Either way, the result is that some of your queries are going to be delayed or at least slowed down.
If there are more queries than there are slots in your queue, there’s no way around the excess queries having to wait until a slot becomes available. At best you’re looking at a 5 second wait while a load is resolved, at worst you could be looking at several minutes of waiting for transforms to vacate your queue and backlog.
Then there’s the issue of your larger queries taking resources away from smaller ones.
Redshift is greedy in that it tries to allocate the maximum possible resources to deal with your queries. These resources are your concurrency slots and the available memory of the cluster. The concurrency slots are simple enough in that any new query (that fits your queue criteria) will search for an open slot and either take an available one or get in the queue for one. Available memory is a little more problematic.
Basically, if you have a large complex query (such as a transform) that’s being dealt with, Redshift will attempt to assign as much memory as possible to solve it. This is good for that query, but can throttle the memory assigned to other queries and slow them down.
Workload management is the solution to this problem via creating distinct query queues to handle different types or groups of queries and allocating a certain amount of memory for each queue to draw from. This lets you protect your key queries from each other and maximize your query throughput through your parallel queues.
Automatic vs manual WLM

There are two kinds of workload management available; automatic and manual.
Automatic workload management (Auto WLM) lets Redshift handle managing query concurrency and memory allocation. Redshift will manage up to 8 query queues and assign resources based on what it deems to result in peak performance. This takes the pressure off you and lets you focus on other work such as analyzing your findings from the data being processed.
Manual workload management (Manual WLM or just WLM) is the opposite - it requires you to set query concurrency and memory allocation manually. This might sound like a drawback, but it also gives you the freedom to enforce certain rules in a way that Auto WLM doesn’t.
However, no matter which kind of workload management you use, your queries and queues will need to have sufficient memory assigned to them. If they don’t then they will fall back to disk, slowing down not only the queries themselves but also the entire cluster.
Acknowledging this, it would be wrong to think that either Auto WLM or Manual WLM is better than the other. It’s less “which is better to use” and more “when should I use either”.
When your Redshift clusters are part of a code environment it will generally make more sense to use Auto WLM. This is because the automatic adjustments Redshift will make should keep your system running at peak performance while taking the effort of managing your queues and memory allocation off of your shoulders.
However, in instances where you’re often inputting queries manually it can be better to also have manual control over your WLM.
Manual WLM allows you to manually prioritize certain queries over others according to your parameter groups. This makes it ideal for use cases such as manual data science analysis, and others where your Redshift server is being operated in isolation.
For example, let’s say that you’re running manual data analysis and have several queries lined up.
You have 20 smaller simple queries to copy data into your database - nothing fancy, and quick to run. A further 5 queries are scheduled transformations appending new data from regular sources, which will take significantly longer to complete. Then at any point you have the potential for up to 10 ad-hoc queries to be added to the queue, representing your team looking up data.
In this configuration Auto WLM would try to have as many queries in parallel at the same time as possible, be it through creating extra queues or increasing the slots in your queues. However, this would be juggled with trying to assign more memory to your transformations due to their needing more resources to run.
This would leave your ad-hoc queries in a dead zone of being too long to quickly deal with but not complex enough to warrant assigning a good portion of memory to, thus slowing them down further.
Manual WLM would let you prioritize everything exactly as you want (albeit with less flexibility to adapt). So, you could create separate queues for each type of query and assign a certain amount of memory to each queue based on their requirements - a small amount for simple queries and incrementally more for ad-hoc and then the transformations.
While risking not using your cluster’s full capabilities at all times, this would keep your ad-hoc data requests safe from your other queries and always running at high efficiency relative to Auto WLM.
It’s a fine line to walk, but this is why it’s generally better to use Auto WLM for most configurations and Manual WLM for situations where you need to maintain a set priority and resource assignment level for your queries.
How to set up WLM

Setting up your workload management preferences is pretty straightforward. All you have to do is know how many query queues you need, how many query slots each queue should have, how much memory to assign to each queue, and how to define which queries will go into what queue.
Knowing what your team needs in particular is what requires you to do a little planning and preparation.
To that end, there are four steps to setting up your WLM:
- Set up users
- Define workloads
- Group users
- Configure WLM
Set up users
First you need to set up your users.
When Redshift is set up it comes with a default user. The main mistake made here is that people often share this user login instead of creating separate users for different purposes. In other words, it’s impossible to see who is running a particular query (which could be useful for prioritizing them in WLM).
So, set up as many different users as you think you’ll need for attribution. This could mean creating users for every person with access, users for different data loads, or even users for your different dashboards.
If you need granularity in seeing when a particular person or data load submits a query, they need to have a separate user to do so.
Define workloads
Remember when we talked about why WLM is so useful? We split queries into the same three categories that Intermix Software and Integrate.io use:
- Loads - queries which load data into your clusters or unload data from them, including COPY and ULOAD queries
- Transforms - scheduled transformation queries, including INSERT, UPDATE, and DELETE queries
- Ad-hoc - queries submitted by your analysts or dashboards, such as SELECT queries
You need to do the same for your workloads - that is, the queries that you tend to get. By grouping them in this way you can start to separate your workloads by the time they take to complete and the resources they demand, which will then let you accurately configure your WLM settings.
Group users

Before diving into your WLM settings you now need to group your users according to the queries that they submit. This is as simple as collecting users that submit your different workload groups together (eg, a load group, a transforms group, and an ad-hoc group).
This will still let you track which users are responsible for which queries, but provides Redshift with a framework to use when trying to prioritize your queries. So, when Redshift WLM receives a load query from the load user group, it will know to search for queues related to that user group to put the query into so that doesn’t get stuck behind lengthy transforms.
Configure WLM
Now all you need to do is set up 3 new queues (one for each user group), decide how many queries should run simultaneously in each, and how much memory to assign to each queue as a whole.
As a general rule of thumb, loads will need the least memory allocation per slot in their queue, whereas transforms will need the most. Ad-hoc queries are somewhere in the middle. However, transforms will generally be the least common query submitted, with loads being more common and ad-hocs being the most common (or at least, they have the potential to be the most common, which is what’s important here).
As such your load queue should have the lowest memory allocation of the three but more concurrent query slots than your transforms. The transforms queue will need a higher memory allocation but, due to the low demand, will need a small number of slots and thus only a slightly higher memory allocation overall than loads.
The ad-hoc queue will likely need both the highest memory allocation and the largest number of concurrent slots available. This is because you cannot predict when these queries will be submitted but they are some of the most noticeable if slowed down in your queue. As such you should make your queue for them available for more than you typically think you will need.
Making the most of your AWS

As we’ve already mentioned, both Auto WLM and Manual WLM are fantastic tools for helping you to get the most out of your Redshift cluster. By optimizing your query processing time and maximizing throughput you can make sure that you’re wasting as few resources as possible when it comes to your company’s AWS usage.
It’s also important to factor in the cost of your optimization.
AWS billing is confusing at the best of times. Cost and Usage Reports barely simplify the situation, and it’s incredibly easy to go over budget when assigning new resources and trying to optimize your systems without a firm understanding of the finances behind your operation.
The best way to avoid AWS overspending (be it with overzealous Redshift allocation or otherwise) is to use Aimably’s suite of tools to monitor, analyze, and alert you to sudden changes in your AWS bill.
For example, with Aimably Insight you can get a sense of how your WLM use might be affecting your bill, and whether that influence is a positive or negative thing. Aimably Warn can alert you to sudden changes in your spending, making it easy to know when things are getting out of control.
In other words, if you want to make the most of your Redshift use with workload management, you should be careful not to lose track of the bigger AWS picture. Optimizing usage is all well and good, but if it costs twice as much to allocate the necessary resources it could be a zero-sum operation.


.jpg)